Learning to wedge again
Score and Comment on this Case
Clinical Details
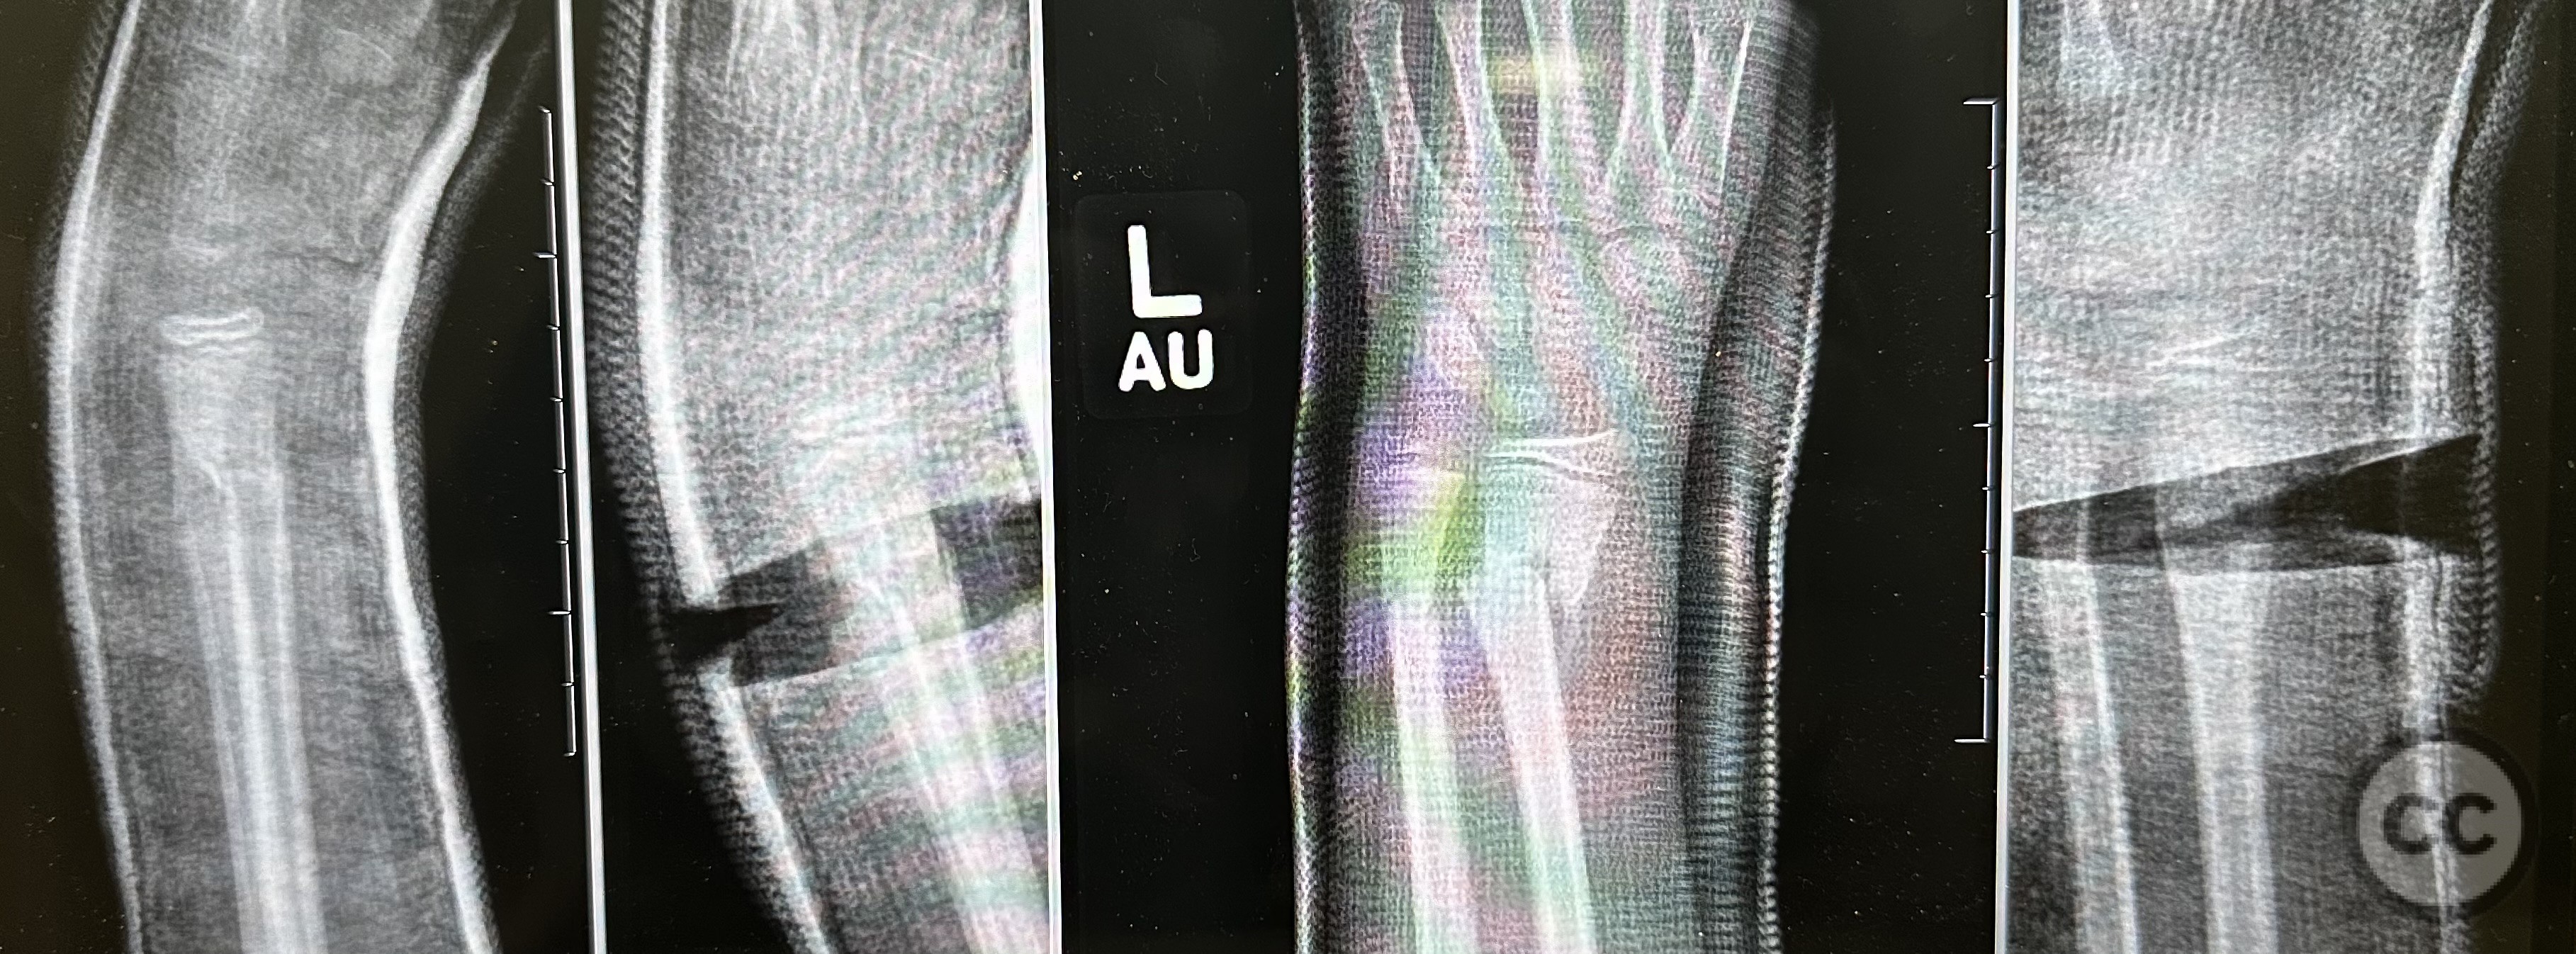
Clinical and radiological findings: In the quiet hum of the clinic, the fluorescent lights cast long shadows as we examined the radiographs. There, in the stark contrast of black and white, lay the landscape of the young patient's musculoskeletal system - a topography of bone and joint yet to fully realize its mature form. The initial radiographs, much like the prologue to an unfolding saga, hinted at the tale of a limb in distress. The subtle deviation of alignment, the gentle arc of the distal radius taking on an unwelcome bend, whispered of an orthopedic condition amiss. The tale was further told in the growth plates, their natural symmetry askew, like the wings of a moth drawn too close to the flame. As daysrolled into weeks, sequential radiographs documented the narrative of growing deformity as the swell of injury gave way to a spacious cast. Like silent sentinels, the XR kept watch, each frame a frozen moment in the evolving story of angulation. It was a tale told in degrees and millimeters, the orthopedic equivalent of the steady, inexorable tick of a clock toward a sentence of protracted remodeling. Then came the turning point, the plot twist in our story. A radiograph, different from the others, showed not just progression, but opportunity. An idea took root - could we, like well-intentioned puppeteers, guide the course of this deviating narrative back towards normality? The principle of guided growth yet applied unto the non-operative radius!?, the quiet power of the cast wedge, began to lay its hopeful shadow over our deliberations. The culmination of our tale was a final series of radiographs, post-wedge. Like a sunrise over a long dark night, they illuminated the new alignment, the bone coaxed back into place as if by an unseen hand. The saga concluded with the potential for a happier ending, the journey of cast wedging leading us to a vista of better orthopedic health. This journey of discovery was not my clinical exercise, but rather a humble testament to the resilience and adaptability of the young body, its capacity for correction, and the silent, guiding role we play as clinicians in our oft helpless observing and witnessing overseers of this incredible process.
Preoperative Plan
Planning remarks: preoperative plan for a cast wedge procedure: 1. **Patient Assessment and Diagnosis:** Start with a thorough clinical examination and review the patient's X-rays or other imaging results. Determine the necessity of a cast wedge based on the alignment issue that needs to be corrected. 2. **Case Discussion:** Discuss with the team the condition and why a cast wedge would be the most suitable non-operative intervention. Consider the degree of angulation or displacement and how the cast wedge can influence that. 3. **Selection of the Cast Material:** Decide on the type of cast material suitable for the patient's condition, age, and lifestyle. Traditional plaster is often favored for wedging due to its versatility, though fiberglass can also be used. 4. **Application of the Initial Cast:** Apply the cast in a standard manner, ensuring correct positioning of the patient's limb and adequate immobilization of the joints above and below the affected area. Take care to avoid any pressure points that could cause skin complications. 5. **Plan for the Cast Wedge:** Once the cast has hardened, mark the area where the wedge needs to be inserted. This would be dictated by the direction of correction needed. The wedge size should correspond to the desired angulation correction. 6. **Execution of the Cast Wedge:** Use a cast saw to make a cut where the wedge will be placed. Cut through the cast layers without cutting the underlying padding, to avoid patient discomfort and potential skin injury. 7. **Insertion of the Cast Wedge:** After the cut is made, spread the cast to create the desired angulation, inserting additional casting material into the created space to maintain the position and ensure structural integrity. 8. **Post-procedure Assessment:** Assess the new alignment clinically and by X-ray to ensure the intended correction has been achieved. Make adjustments as necessary. 9. **Patient Education and Follow-up:** Educate the patient and caregivers on cast care, including signs of complications to look for. Schedule a follow-up to monitor the progress and make sure the correction is being maintained.
Surgical Discussion
Patient positioning: Supine. Candles. Enya.
Anatomical surgical approach: None - we are saving a child form the horrors of surgery.
Operative remarks:Friendships, let's go step-by-step through the process of wedging a cast in an outpatient clinic setting:
1. **Marking the Area for the Wedge:** After applying the initial cast and allowing it to dry, you should mark the area where the wedge is to be placed. This is typically where the deformity is most pronounced, and the direction and degree of correction required would dictate the exact location. Use a skin-safe marker to clearly outline the area.
2. **Making the Cut:** Using a cast saw, cut through the layers of the cast at the marked location. It's essential to do this without cutting the underlying padding, to avoid any discomfort or potential injury to the patient. This might require a skilled hand and careful attention. I’m going to be honest with you. Many of the online tutorials like the AO website. Failed to tell you that you should only leave just a very small connecting piece so you can do multiplanar correction.
3. **Spreading the Cast:** Once you've made the cut, spread the cast apart at the incision to create the desired angulation. The exact amount will be dictated by the correction needed, and should be done gently to ensure the patient's comfort.
4. **Inserting the Wedge:** Following this, insert additional casting material into the gap. This is your 'wedge'. It should be appropriately sized to maintain the intended angulation. You might choose to dampen it before insertion, allowing it to mold effectively to the shape of the existing cast.
5. **Securing the Wedge and Cast:** Once inserted, the wedge must be secured. This could involve wrapping an additional layer of cast material around the entire construct, ensuring the wedge stays in place and the cast retains its structural integrity.
6. **Assessment and Verification:** After the modified cast has hardened, assess the new alignment. This should be done clinically first, by visually inspecting the limb and the cast. Also, an X-ray can be taken to ascertain that the desired correction has been achieved.
7. **Post-wedge Instructions and Follow-up:** Following the procedure, provide the patient with appropriate care instructions. This includes signs of complications to look for, such as increased pain, numbness, or changes in skin color. A follow-up appointment should be scheduled to monitor the progress and ensure that the correction is being maintained.
Remember that this is an art as much as it is a science, and it may take some experience to get it just right. Also, the patient's comfort should be a priority throughout the process.
Postoperative protocol: The postoperative protocol for a cast wedge procedure typically includes the following steps: 1. **Patient Education:** The first step involves educating the patient and their caregivers about how to care for the cast, what activities to avoid, and how to recognize potential complications. This includes instructions about keeping the cast dry, not inserting anything into the cast, and avoiding putting weight on the cast unless explicitly instructed. 2. **Pain Management:** Mild to moderate pain and discomfort are expected after the procedure. Over-the-counter pain relievers like acetaminophen can be recommended, unless there are contraindications. Ensure that the patient understands not to exceed the recommended dosage. 3. **Swelling Management:** Elevation of the casted limb can help to reduce swelling. Ice packs can also be used, but it's important that they are wrapped in a cloth to prevent direct contact with the skin, and that the cast does not get wet. 4. **Monitoring for Complications:** Patients and caregivers should be made aware of the signs of potential complications. These could include persistent or severe pain, numbness or tingling, swelling that doesn't decrease with elevation, color changes of the fingers or toes, and foul odors or drainage from the cast. 5. **Follow-Up Visits:** Arrange for regular follow-up visits to monitor the correction progress. These appointments would include a clinical evaluation and X-rays to ensure that the desired correction is being achieved and maintained. 6. **Cast Removal and Rehabilitation:** Once the correction has been deemed sufficient, a plan for cast removal can be scheduled. Following removal, the patient might require physical therapy to regain strength, flexibility, and range of motion. This protocol is a general guideline and might need to be adjusted based on the patient's specific condition, age, and overall health.
Orthopaedic implants used: A cast wedge can be purchased or 3D printed form PLA. The one in thumbnail I 3D printed. The other pics are another example.
Search for Related Literature


Industry Sponsership
contact us for advertising opportunities
Article viewed 634 times
27 Jun 2023
Add to Bookmarks
Full Citation
Cite this article:
David Bennett. (2023). Learning to wedge again. Journal of Orthopaedic Surgery and Traumatology. Case Report 38528815 Published Online Jun 27 2023.